


Hello again Warriors! Have you ever wondered how boxers wrap their hands before they start their training? For a long time I was curious about how it was done right.
I learned from my time at Title Boxing that there are multiple steps to wrapping your hands for boxing. That and the wraps also serve a purpose. We’re going to learn the following:
- WHAT HAND WRAPS ARE FOR
- HOW TO WRAP YOUR HANDS BEFORE YOU PUT YOUR BOXING GLOVES ON, STEP BY STEP
- STEP 1: SECURE THE WRIST
- STEP 2: WRAP AROUND THE KNUCKLES
- STEP 3: WRAP AROUND THE FINGERS
- STEP 4: WRAP AROUND THE PALM
- STEP 5: WRAP AROUND THE WRIST AGAIN
- STEP 6: WRAP AROUND THE KNUCKLES AGAIN
- STEP 7: WRAP AROUND THE WRIST AND KNUCKLES ONE MORE TIME
- STEP 8: FINISH AT THE WRIST
First, What are Hand Wraps For?
Hand wraps are essential for boxers, as they provide support and protection for your hands when you’re throwing punches on a punching bag or an opponent. Without wraps on your hands, you may experience fractures or breaks in your hand and finger bones, and even bruises on your knuckles.
My boxing trainer told me that there once was a guy who didn’t have his hands wrapped and he was punching on a bag so hard, his knuckles got all swollen and purple at the end of his workout. So hand wraps are a must for boxing so that you don’t get hurt.
How do You Wrap Your Hands Before You Put Your Gloves On?
Today I’m going to walk you through a tutorial that I learned from my trainer at my local Title Boxing Club and from a subsidiary YouTube channel of Title Boxing. Personally, I think this hand wrapping tutorial I learned is the easiest one there is.
Now, I am NOT an expert, I am still a beginner who is still practicing this technique. Here is the video tutorial in action so you can follow along: How to Wrap Your Hands for Boxing – TITLE Boxing Club
Step 1: Secure the Wrist
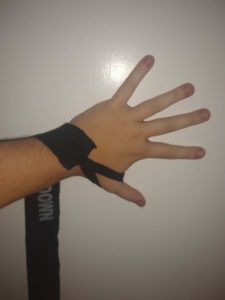
The first thing you do is you insert your thumb into the thumb loop. The side that says “This Side Down” should be placed face down so that you don’t wrap your hands backwards. Wrap diagonally and then around your wrist (I usually wrap around the wrist 3 times. It varies depending on the length of your wraps)
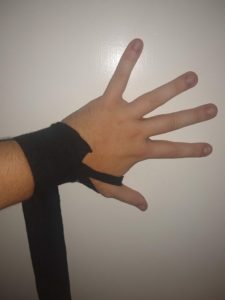
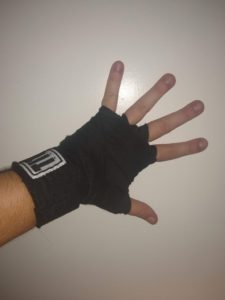
Step 2: Wrap Around the Knuckles

Once you have your wrist wrapped, wrap diagonally towards your pinkie finger and start to wrap around the knuckles (again, I recommend wrapping about 3 times) and keep your fingers spread apart while you’re doing this. You don’t want to have your fingers too close together, you want to still be able to move them. That and you want space in between for the next step.
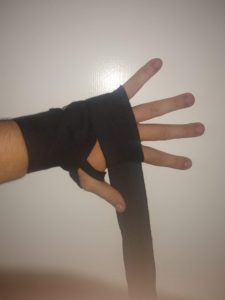
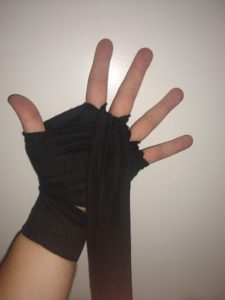
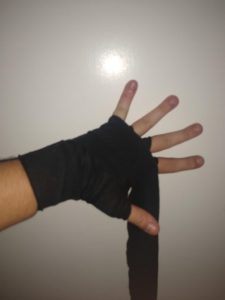
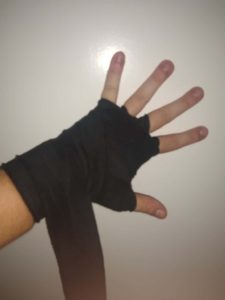
Step 3: Wrap Around the Fingers
After wrapping the knuckles, next you’re going to wrap between the fingers. Start by wrapping between pinkie and the ring finger. Then wrap between your ring finger and your middle finger. And finally, between your middle finger and your index (pointer) finger. If there’s not enough space to wrap around the fingers, you’ll have to go back to step 2 so you can spread the fingers out.
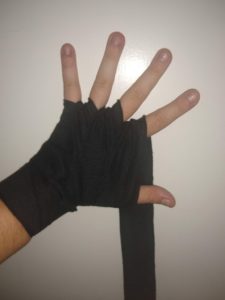
Step 4: Wrap Around the Palm
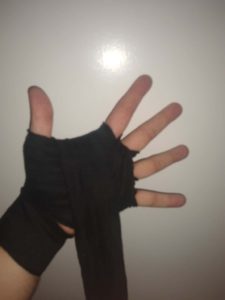
This step can be a little tricky. Once you finish wrapping your fingers, wrap down at the wrist and come around between your index finger and your thumb. This will ensure that your fingers and your thumb will be secure. I would recommend you flip your hand over (with your palm facing up) for this step.
Step 5: Wrap Around the Wrist Again
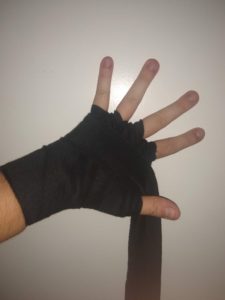
Once you wrapped your palm, start wrapping diagonally across your hand and down towards your wrist. Then wrap around the wrist. I recommend you do this about once or twice, depending on the length of your wraps. This will add some more security to your wrist to reduce the risk of sprains.
Step 6: Wrap Around the Knuckles Again
After you wrap your wrist, wrap diagonally up (so your wraps make a criss cross over your hand) and wrap around your knuckles. Again, I recommend once or twice, depending on the length of the wraps. This will add extra padding for your knuckles so that they don’t get fractured or bruised under your glove.
Step 7: Wrap Around the Wrist and the Knuckles One More Time
Repeat steps 5 and 6 until you have just enough wrap to finish wrapping your hands for the final step.
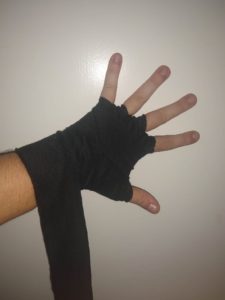
Step 8: Finish at the Wrist
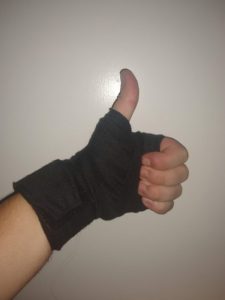
Wrap around the wrist about 3 times to secure it one last time. When you finish, make a fist to see how it feels. You don’t want to wrap your hands too tight, to the point where the wrap will cut off circulation. What you want is for the wrap to be a snug fit so your entire hand will be protected when you’re throwing punches, and so that the wrap will not come loose under your glove.
Once you’ve successfully wrapped one hand, simply repeat all the steps for your other hand. Now both your hands are wrapped and you’re ready to put your gloves on and punch away on the punching bag!
Closing Words
Wrapping your hands this way takes practice, so keep trying until you can get it! Even I’m still practicing it over and over until I’ve got the hang of it! Let me know in the comments below your experience with boxing hand wraps, and if you know of any other techniques for wrapping your hands!